

A damp crawl space can quietly damage a home. Excess moisture often leads to mold growth, pest infestations, and higher energy bills. Crawl space encapsulation seals off this vulnerable area, keeping it dry, clean, and more energy efficient. By creating a controlled environment beneath the house, it helps protect both the structure and indoor air quality.
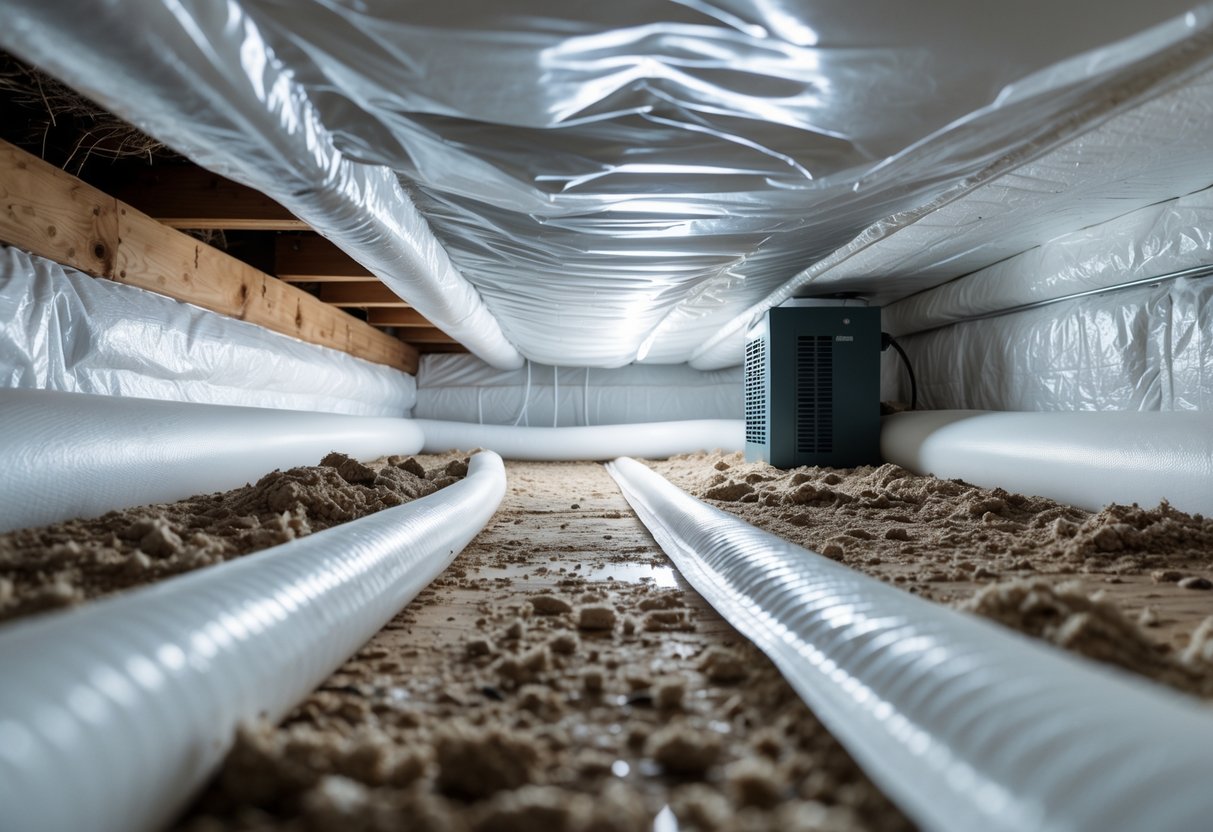
Encapsulation involves sealing vents, adding a durable vapor barrier, and often installing a dehumidifier. These steps prevent moisture from seeping in and stop pests from thriving in dark, damp conditions. The result is a healthier home environment with fewer risks of structural damage.
Beyond protection, encapsulation can also lower heating and cooling costs. A sealed crawl space reduces humidity and air leaks, allowing HVAC systems to work more efficiently. For many homeowners, this upgrade offers both immediate comfort and long-term savings.
Key Takeaways
- Encapsulation keeps crawl spaces dry and reduces moisture problems
- It helps prevent mold growth and pest activity under the home
- A sealed crawl space improves energy efficiency and lowers costs
Understanding Crawl Space Encapsulation
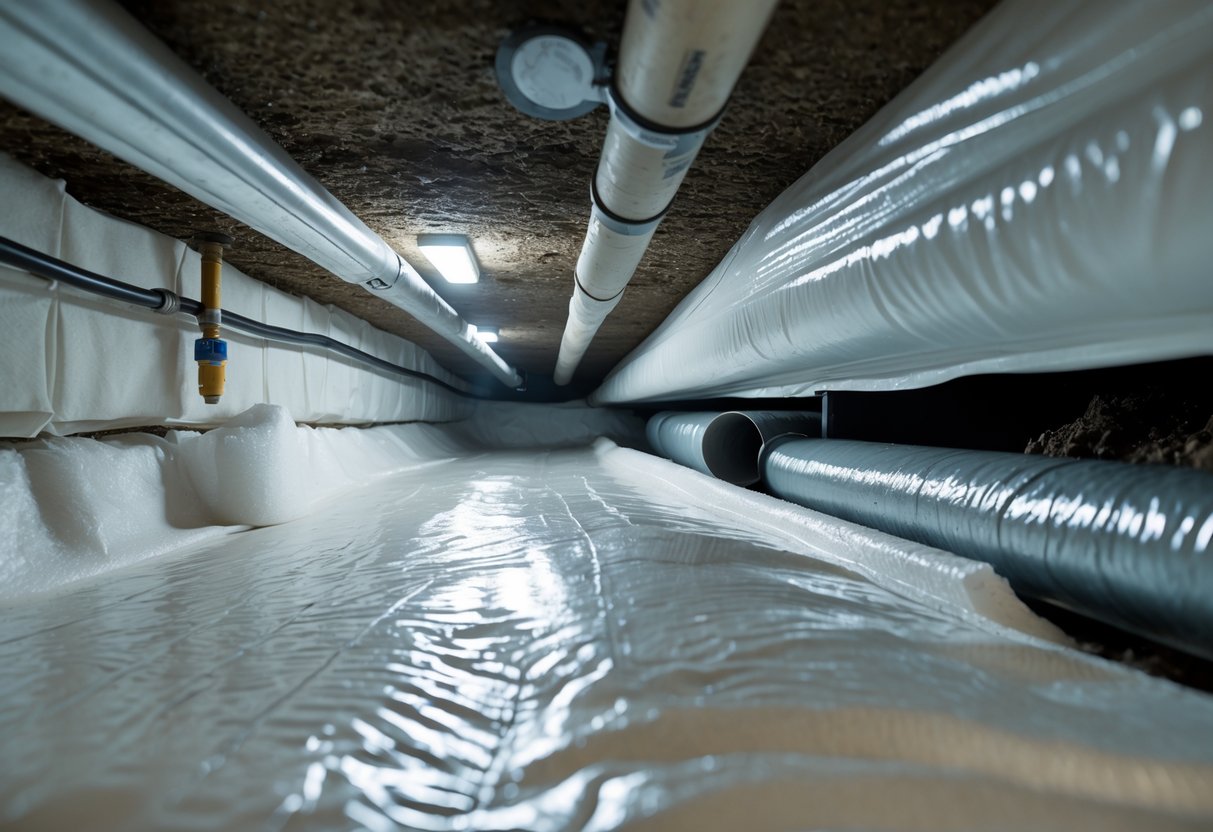
Crawl space encapsulation involves sealing and conditioning the area beneath a home to control moisture, improve air quality, and protect the structure. It reduces risks such as mold, wood rot, and pest infestations while also improving energy efficiency.
What Is Crawl Space Encapsulation?
Crawl space encapsulation is the process of closing off the crawl space from outside air and ground moisture. Contractors typically install a thick vapor barrier across the dirt floor and walls to stop water vapor from entering.
The space is then sealed by covering vents and gaps with insulated panels or spray foam. In many cases, a commercial-grade dehumidifier is added to keep humidity below 60%.
An encapsulated crawl space creates a controlled environment that reduces dampness and prevents mold growth. Unlike a vented crawl space, which allows outside air to circulate, this method keeps conditions stable year-round.
By limiting moisture and air leaks, encapsulation helps protect wooden beams, insulation, and flooring from long-term damage. It also creates a cleaner and more usable space beneath the home.
How Crawl Space Encapsulation Works
Encapsulation works by combining moisture barriers, sealing methods, and mechanical systems to manage humidity. The first step usually includes removing debris and leveling the ground so the vapor barrier can lay flat without tearing.
A reinforced plastic sheet, often 12–20 mil thick, is installed across the ground and walls. Seams are taped, and edges are sealed to prevent air leaks.
Next, vents and openings are closed off to stop humid outdoor air from entering. In homes with water intrusion issues, sump pumps or drainage systems may be added.
Finally, a dehumidifier maintains consistent humidity levels, preventing condensation on wood and ductwork. This system protects the crawl space from becoming a source of mold, odors, and structural decay.
Encapsulated vs. Vented Crawl Spaces
A vented crawl space relies on exterior vents to allow airflow. While once considered standard, this design often increases moisture problems, especially in humid climates. Outdoor air carries water vapor that condenses on cool surfaces, leading to mold and wood rot.
An encapsulated crawl space, in contrast, is sealed and conditioned. It blocks out ground moisture, pests, and humid air. Homeowners often see lower energy bills because HVAC systems no longer fight against damp, unconditioned air rising into the home.
The table below highlights key differences:
| Feature | Vented Crawl Space | Encapsulated Crawl Space |
|---|---|---|
| Moisture Control | Poor | Strong |
| Pest Resistance | Low | High |
| Energy Efficiency | Low | Improved |
| Air Quality Impact | Negative | Positive |
| Long-Term Maintenance | Higher | Lower |
Encapsulation provides a more stable and protective environment, while vented designs often create ongoing maintenance challenges.
Moisture Control and Prevention
Moisture in crawl spaces often enters through the soil, walls, or outside air and can damage wood, insulation, and air quality. Proper control methods such as barriers and mechanical systems keep the space dry, reduce mold growth, and protect the home’s foundation.
Sources of Moisture in Crawl Spaces
Moisture intrusion in crawl spaces comes from several common sources. Groundwater can rise and seep through the soil, especially in areas with poor drainage. Foundation walls may also allow water to pass through small cracks or porous concrete.
Open vents are another pathway. They let in humid outside air, which condenses when it meets cooler surfaces inside the crawl space. This raises humidity levels and creates damp conditions.
Plumbing leaks contribute as well. Even small drips from pipes can add constant moisture to the space. Over time, this leads to wood rot, mold growth, and pest attraction.
Main sources of crawl space moisture include:
- Groundwater and soil vapor
- Foundation wall seepage
- Open vent airflow
- Plumbing leaks
Identifying the source is the first step in choosing the right control method.
Role of Vapor Barriers
A vapor barrier blocks moisture from entering through the soil and walls. It is usually a thick polyethylene sheet installed across the crawl space floor and extended up the walls. Proper vapor barrier installation requires sealing seams and edges to prevent gaps.
When installed correctly, the barrier reduces ground moisture migration into the air. This lowers humidity, which helps prevent mold, mildew, and wood decay. It also improves indoor air quality since crawl space air often moves upward into living areas.
Vapor barriers also discourage pests. Many insects and rodents are drawn to damp conditions, so keeping the space dry makes it less attractive.
Key benefits of vapor barriers:
- Limits soil moisture intrusion
- Improves air quality
- Reduces mold and wood rot risks
- Deters pests
Dehumidification Strategies
Even with a vapor barrier, some humidity may remain. A crawl space dehumidifier helps regulate moisture that enters through air leaks or plumbing issues. Unlike standard units, these are designed to run in cooler, confined areas.
The dehumidifier pulls in damp air, removes excess water, and releases drier air back into the space. Collected water drains outside or into a sump pump system.
Maintaining proper humidity levels, typically between 40% and 60%, prevents condensation on wood and insulation. This reduces the chance of mold growth and protects the home’s structure.
Effective dehumidification practices include:
- Installing a crawl space dehumidifier sized for the area
- Connecting the unit to a drain line
- Monitoring humidity levels with a hygrometer
Dehumidification works best when combined with vapor barrier installation and sealed vents, creating a controlled environment that limits moisture problems.
Protecting Against Mold and Pests
Moisture and unsealed openings in crawl spaces create conditions where mold and pests thrive. Encapsulation reduces these risks by controlling humidity, blocking entry points, and improving indoor air quality.
Mold Growth and Health Risks
Mold grows quickly in damp, dark spaces where humidity stays high. Crawl spaces without barriers often collect ground moisture, and this trapped dampness leads to mold growth on wood, insulation, and other surfaces.
Mold spores travel through the air and can spread into living areas. This affects indoor air quality and may trigger allergies, asthma, and other respiratory problems. Families with children or elderly members are especially vulnerable.
Encapsulation helps by installing a vapor barrier over the ground and walls. This barrier prevents moisture from entering and keeps humidity at safe levels. By reducing excess dampness, it removes the environment mold needs to grow.
Routine inspections remain important. Even with a sealed crawl space, small leaks or plumbing issues can reintroduce moisture. Checking humidity levels and keeping them below 60% offers reliable protection against mold growth.
Pest Infestations and Prevention
Crawl spaces attract pests such as termites, rodents, and insects because they provide shelter, food sources, and moisture. Termites feed on wood, while rodents often chew insulation and wiring, creating safety hazards.
Encapsulation makes the space less inviting. A sealed barrier blocks access to soil and reduces standing water, which many pests depend on. Without damp conditions, insects and rodents have fewer reasons to enter.
Homeowners can also add pest-resistant insulation or install traps at entry points for extra protection. Regular monitoring for droppings, chewed materials, or mud tubes helps detect infestations early.
By limiting both food and water sources, encapsulation reduces the likelihood of recurring pest problems. This protects the structure of the home and lowers the need for frequent pest control treatments.
Sealing Vents and Gaps
Open vents and gaps in crawl spaces provide direct entry for pests and allow humid outdoor air to flow inside. This airflow raises moisture levels and undermines the effectiveness of insulation.
Sealing vents with rigid covers and using foam or caulk around pipe and wire openings closes off these pathways. A sealed crawl space stays drier and more secure against intrusions.
In many cases, contractors also install a dehumidifier to maintain balanced air conditions. Together, sealed vents, vapor barriers, and controlled airflow create a stable environment that resists both mold and pests.
Proper sealing not only blocks unwanted entry but also improves energy efficiency by reducing drafts and heat loss through the foundation.
Energy Efficiency and Cost Savings
Crawl space encapsulation helps limit energy loss, reduce utility bills, and improve comfort inside a home. By sealing off outside air and controlling moisture, it creates a stable environment that supports efficient heating and cooling.
Impact on Energy Efficiency
An unsealed crawl space allows outside air to move freely under the home. This exchange can make floors colder in winter and warmer in summer, forcing HVAC systems to work harder.
Encapsulation creates a barrier that reduces drafts and temperature swings. By sealing gaps and covering exposed soil with a vapor barrier, the crawl space becomes part of the conditioned space.
Studies show that homes with encapsulated crawl spaces can experience up to 15–20% less energy loss. This improvement supports more consistent indoor temperatures and reduces strain on heating and cooling equipment.
Reducing Energy Costs
When HVAC systems run less often, they consume less electricity or fuel. This directly lowers monthly energy bills. For many homeowners, the savings may offset a portion of the installation cost over time.
For example:
| Home Size | Avg. Monthly Energy Bill Before | After Encapsulation | Estimated Savings |
|---|---|---|---|
| 1,500 sq. ft. | $180 | $150 | $30 |
| 2,000 sq. ft. | $220 | $180 | $40 |
The exact savings depend on climate, insulation levels, and energy rates. Still, most households notice reduced costs within the first year. Lower demand on HVAC systems also extends the lifespan of equipment, helping avoid premature replacements.
Insulation Benefits
Encapsulation often includes adding rigid foam board or spray insulation to crawl space walls. This step prevents heat transfer between the crawl space and the living areas above.
Insulation reduces cold floors in winter and keeps indoor spaces cooler in summer. It also works with the vapor barrier to block moisture, which can damage traditional insulation materials like fiberglass.
A well-insulated crawl space creates a more balanced indoor climate. Families notice fewer drafts, steadier floor temperatures, and less need to adjust thermostats. By combining insulation with sealing, homeowners get both comfort and measurable energy savings.
Structural Integrity and Home Value
Crawl space encapsulation helps protect the foundation of a home by reducing moisture, limiting pest activity, and preventing long-term structural issues. These improvements not only safeguard the property but also make it more appealing to future buyers.
Preventing Structural Damage
Moisture in a crawl space often leads to weakened support beams, shifting floors, and cracks in the foundation. Encapsulation reduces humidity levels and blocks water intrusion, helping the structure remain stable.
By sealing vents and gaps, the crawl space becomes less vulnerable to external weather conditions. This lowers the risk of soil movement and foundation settlement.
Key benefits of reduced moisture exposure:
- Stronger floor joists and beams
- Fewer cracks in walls and ceilings
- Lower chance of costly foundation repairs
Preventing structural damage early saves homeowners from repairs that can easily exceed tens of thousands of dollars.
Protecting Against Wood Rot
Wood rot occurs when damp conditions allow fungi to break down wooden framing. Floor joists, sill plates, and beams are especially at risk. Once rot sets in, the wood loses strength and can no longer support the home effectively.
Encapsulation creates a controlled environment that keeps wood dry. Vapor barriers, drainage systems, and dehumidifiers work together to stop the cycle of moisture absorption.
Without protection, signs of wood rot may include:
- Sagging or uneven floors
- Musty odors from decaying wood
- Visible discoloration or crumbling wood surfaces
By maintaining low humidity, encapsulation extends the lifespan of the home’s wooden structure and reduces the likelihood of expensive replacements.
Increasing Home Value
Buyers often view a sealed crawl space as a sign of proper maintenance and care. A dry, pest-free foundation reduces future repair risks, making the home more attractive in the real estate market.
Encapsulation can also improve energy efficiency, which adds value through lower utility bills. This combination of reduced maintenance costs and better comfort levels strengthens buyer confidence.
Value drivers include:
- Reduced risk of mold and structural damage
- Lower heating and cooling costs
- A cleaner, healthier living environment
Homes with encapsulated crawl spaces often stand out in competitive markets, giving sellers an advantage during negotiations.
Crawl Space Encapsulation Process and Costs
Encapsulation involves a series of steps that prepare, seal, and regulate the crawl space to control moisture, block pests, and improve energy efficiency. Costs vary based on the condition of the space, materials used, and labor requirements, making careful planning important before starting the project.
Inspection and Preparation
The first step is a full inspection of the crawl space. A professional checks for standing water, leaks, mold, wood rot, and pest activity. Any damage must be repaired before encapsulation begins.
Cleaning is also important. Debris, old insulation, and damaged vapor barriers are removed to create a clear surface. If mold is present, remediation may be needed to ensure the space is safe.
Moisture sources are addressed at this stage. This may include improving drainage outside the home, sealing plumbing leaks, or adding a sump pump if groundwater is a problem. Without fixing these issues first, encapsulation will not perform as intended.
Step-by-Step Encapsulation Process
Encapsulation usually follows a structured order:
- Vapor Barrier Installation – A thick polyethylene liner is applied to floors and walls. Seams are sealed with tape or adhesive to create a continuous layer.
- Sealing Vents and Gaps – Open vents, cracks, and wall penetrations are closed to block humid air and pests.
- Insulation – Depending on the home, rigid foam boards or spray foam may be installed on walls for added efficiency.
- Dehumidifier Setup – A crawl space dehumidifier regulates humidity levels and prevents mold growth.
Each step creates a controlled environment under the home. When done properly, the crawl space stays dry, insulated, and easier to maintain.
Factors Affecting Encapsulation Cost
Crawl space encapsulation cost typically ranges from $5,000 to $15,000, though smaller projects may be closer to $1,500. The final price depends on several factors:
- Size of the crawl space – Larger spaces require more materials and labor.
- Condition of the space – Repairs for water damage, mold, or structural issues increase costs.
- Material choices – Thicker vapor barriers, higher-quality insulation, and commercial-grade dehumidifiers raise expenses but improve durability.
- Regional labor rates – Costs vary by location and contractor experience.
A basic breakdown can look like this:
| Component | Typical Cost Range |
|---|---|
| Vapor barrier & sealing | $1,500 – $4,000 |
| Insulation | $1,000 – $3,000 |
| Dehumidifier | $800 – $2,000 |
| Repairs & prep work | $500 – $6,000 |
These factors combined determine whether the project leans toward the lower or higher end of the cost spectrum.
Frequently Asked Questions
Crawl space encapsulation addresses issues like excess moisture, pest entry, and wasted energy. It relies on specific materials and methods that improve air quality, protect structural components, and lower heating and cooling costs.
What are the signs that my crawl space needs encapsulation?
Common signs include musty odors inside the home, visible mold or mildew, damp insulation, pooling water, or wood rot. Homeowners may also notice higher humidity indoors or uneven floors caused by moisture damage.
How does encapsulating a crawl space prevent pest infestations?
Sealing the crawl space removes entry points for rodents, insects, and termites. Dry conditions created by encapsulation also make the area less attractive to pests that thrive in damp environments.
Can crawl space encapsulation lead to significant energy savings?
Yes. A sealed and insulated crawl space reduces drafts and prevents outdoor air from affecting indoor temperatures. This lowers the workload on heating and cooling systems, which can reduce energy bills over time.
What materials are typically used in crawl space encapsulation?
Encapsulation usually includes a heavy-duty vapor barrier, rigid or spray foam insulation, and a dehumidifier. Sealing tape and caulking are also used to close gaps and seams.
How does moisture control in an encapsulated crawl space work?
A vapor barrier blocks ground moisture from entering the space. Insulation and air sealing keep outside humidity from leaking in, while a dehumidifier maintains stable indoor air levels. Together, these steps keep the area dry.
Is professional installation necessary for crawl space encapsulation?
While some homeowners attempt DIY projects, professional installation ensures proper sealing, correct material use, and long-term durability. Experts can also identify hidden problems like drainage issues or structural concerns before encapsulation begins.